Monthly Archives: February 2012

Downtown Cleveland Restaurant Week- Johnny’s Downtown

Standard

Restaurant week in Cleveland is a great way to try many of the FANTASTIC local restaurants and cuisine that Cleveland has to offer.  There are about 40 restaurants participating for the event.  The restaurants offer $30 three course meal (per person) for dinner and $15 lunch specials.  $30 per person may seem like a lot to spend, but this is the opportunity to try the foods at local restaurants, most are “upscale.”  If you added each course up by what they would usually cost individually, all three courses add up to $50 or more!  You are really getting a bang for you buck!

Downtown Cleveland’s 5th Annual Restaurant Week started Monday, February 27, 2012 and ends on Sunday, March 4, 2012.  Here is the link to the list of the participating restaurants and their menus they are offering!  By listing all of the menus, you are able to choose the place that you have a taste for! http://downtowncleveland.com/events/restaurant-week/participating-restaurants-.aspx

On Sunday my boyfriend and I looked at each menu.  We eliminated restaurants that we have already dined at in the past.  We wanted to take the opportunity to dine at a place we haven’t been!  We settled on Johnny’s Downtown located on West 6th.  We made reservations immediately!

We were both extremely and pleasantly surprised with our dining experience at Johnny’s!  The service is impeccable!  Jordan had arrived at the restaurant before me.  When I walked in there was someone up front to take my coat and lead me to the bar to where Jordan was sitting.  The man told me to relax, have a drink, and enjoy myself before we were seated for dinner.  Jordan and I chatted for about 10-15 minutes and watched the Cavs game on the TV.  The hostess came over to see if we were ready to be seated.  He placed both of our drinks on a tray and lead us over to our table.

The gorgeous dark wood work and oversized chandeliers made the atmosphere cozy and impressive, knowing that we were in for a treat.   Our waitress greeted us and handed us both the regular menu as well as the restaurant week menu.  We both had already chosen which meal we were going to have on Sunday, but we noticed there was something different.  The menu was not three-courses… it was four!! A house salad had been added to the menu.  The waitress informed us Johnny’s was the only restaurant offering four courses.  She explained how this was great for the customer’s benefit, but it was also great for the chefs, allowing them to prepare each course with care and perfection.  Here is the link to the menu. Please note the menu does not include the side salad.

This is what I had:

Clams Oreganotto with Fresh Pasta

This was AWESOME!! We were each given to large slices of what seemed to be honey wheat bread.  The bread was warm, which is always a plus.  Our waitress recommended that we dip the bread in the juice of this dish!

Side Salad

This was the item added onto the menu.  Perfect size, just enough balsamic dressing!  Field Greens, walnuts, gorganzola, and balsamic.  Very simple and elegant.

Grilled Salmon with Winter Vegetables Ragout Arincini

The salmon was cooked perfectly.  The winter vegetables included green beans, cauliflower, butternut squash, spinach, and potatoes.  For those of you who don’t know, arincini is fried risotto, which you can see in the upper portion of the picture.

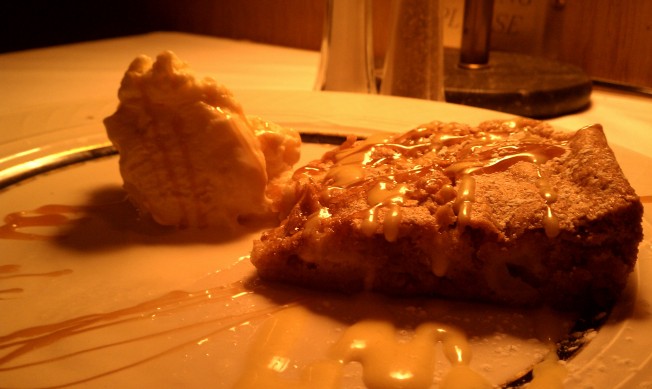
Warm Apple Cake with Salted Caramel

Dessert=YUM! This was so good.  The cake was warm, sweet, moist, and delicious!  I definitely cleared my plate!

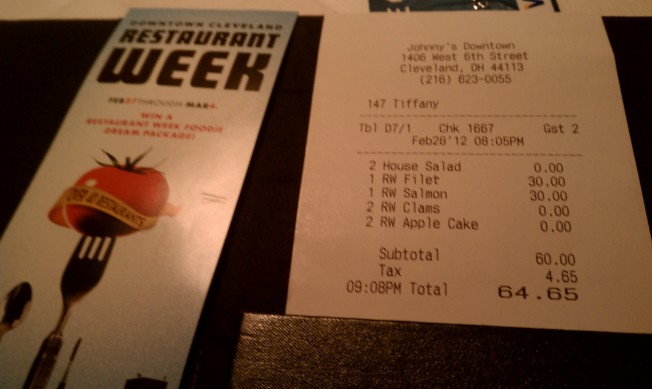
The Bill

We found the bill to be amusing.

If you live in Cleveland I definitely recommended taking advantage of Restaurant week.  I highly recommend Johnny’s Downtown.  Take a look at all of the menus to see what you have a taste for! I recommend making a reservation.   The restaurants are very crowded this entire week!  Most restaurants participating allow you to make reservations through Open Table, but some, such as Johnny’s, do not and you should call!

More info can be found at http://downtowncleveland.com/events/restaurant-week.aspx

Happy Leap Day!

Molly Jean

Roasted Brussels Sprouts

Standard

Brussels Sprouts

As a child and up to about a year, I absolutely HATED brussels sprouts.  On Thanksgiving 2010, my Aunt had made brussels sprouts as one of our sides.  She used chef Michael Symon’s recipe that uses bacon and dried cranberries.  I love all of Michael Symon’s dishes, so of course I tried, knowing that I have hated brussels sprouts in the past.  I loved them!! But lets be honest– anything with bacon is tasty, right? haha

So it wasn’t until this past Christmas that I had brussels sprouts again.  I was celebrating with my boyfriends side of the family.  Someone had made roasted brussels sprouts.  I put them on my plate just to be nice and try everything that was made.  These roasted brussels sprouts were amazing!  I definitely had a second helping!

Now it was time to try them on my own!  Not that roasted vegetables is dificult, but I searched for a recipe just to make sure I was making brussels sprouts the best way possible and that’s when I stumbled upon a recipe from The Cooking Photographer’s blog (click here for original recipe).

Oven Roasted Garlic Brussels Sprouts

Ingredients:

  • 2 lb brussels sprouts- trimmed and halved (or quartered if large)
  • 5 cloves of garlic, minced
  • 1/2 cup water
  • 2 TBSP extra virgin olive oil
  • 1/2 tsp sea salt
  • 1/2 tsp pepper

Directions: 

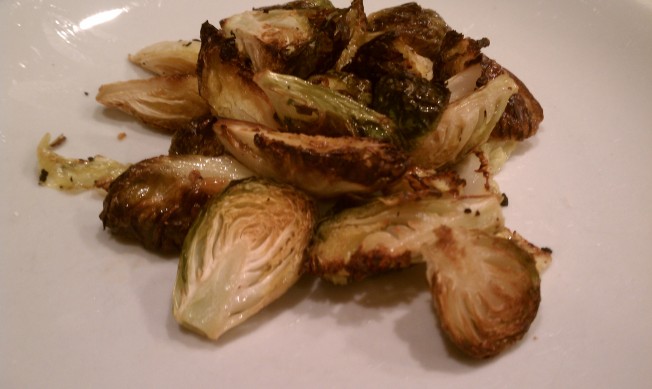
Preheat oven to 425 degrees F.  In a 9×13 baking dish, toss brussels sprouts with garlic, water, oil, salt, and pepper.  Roast for 45 to 50 minutes, tossing once 25 minutes into cooking time.  Brussels sprouts should be carmelized.  Remove from oven and toss around in pan to gather brown bits into the sprouts. Serve and enjoy!

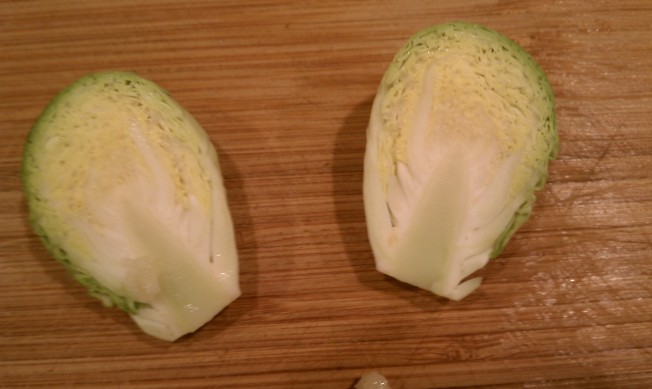
I made a smaller portion of the recipe.  Before I started I wanted to make sure I was trimming the brussels sprouts correctly.  I found this video to help me out! CLick the link http://www.finecooking.com/videos/how-to-trim-brussels-sprouts.aspx

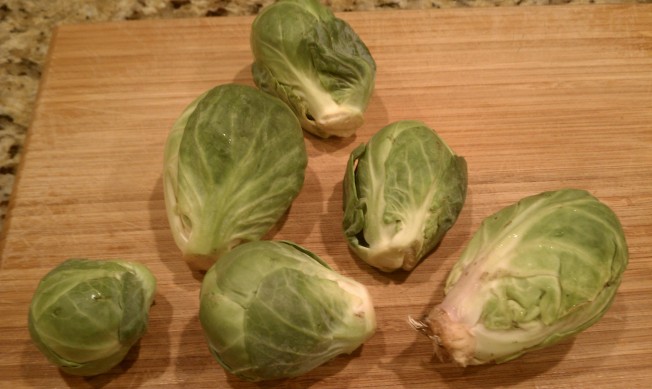
Here are my photo’s. Again, I made a smaller version of the recipe above!

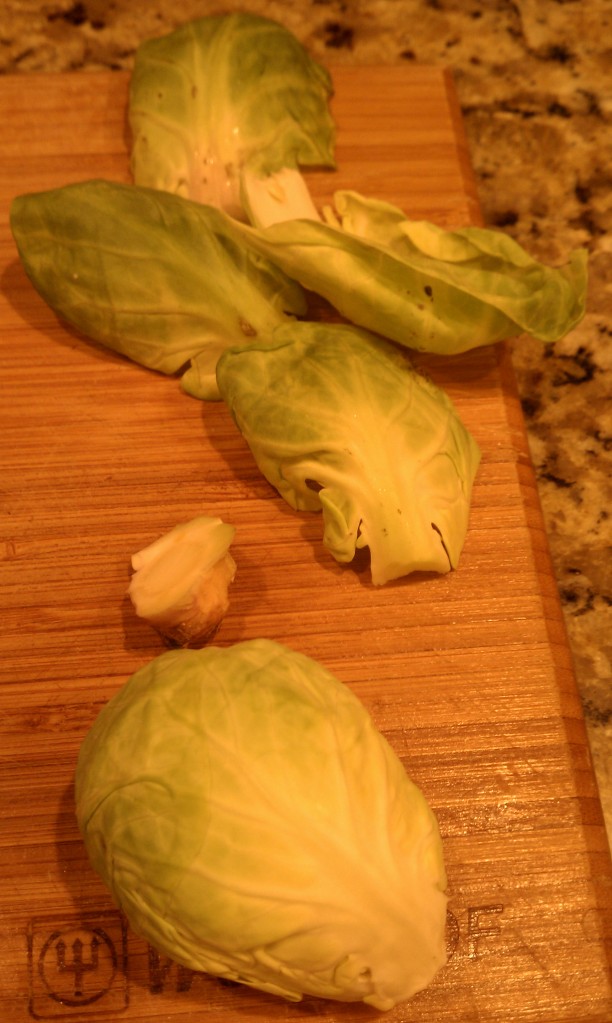
Brussels Sprouts!

Trim

Before

After

I hope you enjoy this wonderful recipe and learn to love this wonderful vegetable as much as I finally do now!

Molly Jean

Spaghetti Squash

Standard

Last night I was finally able to make something that I have wanting to try for quite some time— Spaghetti Squash!  And let me tell you something- I am so disappointed in myself in that I should have tried this much sooner!!  It takes time, but SOOO easy to make!!

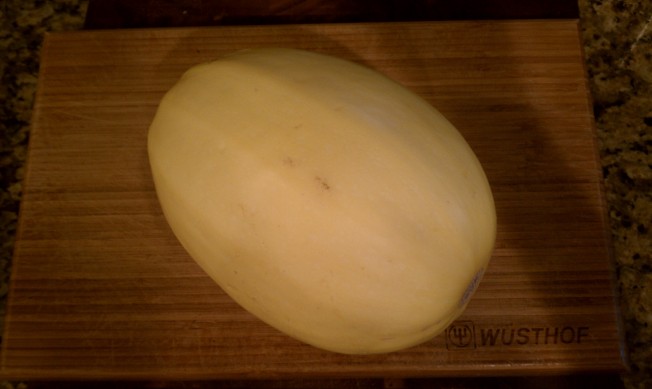
Step 1: Buy a spaghetti squash!  You may want to buy 2 for a family of four.

Spaghetti Squash

Step 2: Preheat oven to 375 degrees F

Step 3: Slice in half and scoops out seeds, just like you would a pumpkin!  Discard seeds or you can bake them just like you would with pumpkin seeds!

Slice and Scoop

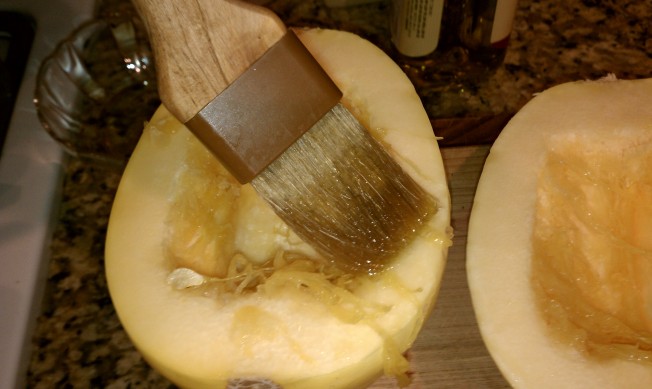
Step 4: Brush inside with olive oil.

Step 5: Place squash halves on a baking sheet, squash side down.

Step 6: Cook squash for 45-50 minutes if only cooking 1 squash.  Up to an hour, or more, depending on your oven, if making more than 1 squash.

Step 7: Once finished, allow squash to cool for a few minutes and then using a fork, scrape the squash “spaghetti” from rind and fluff into spaghetti like strands. (I used tongs in one hand to hold squash while scraping with the other so I wouldn’t burn my hands!)

Scrape

What it should look like!

Step 8: Add any sauce, meat, veggies, just as you would with pasta and enjoy!

I topped with this fabulous sauce that I got half off at Heinen's!

Topped with some fresh parmesan cheese! YUM!

This is a great alternative for those who love pasta and need a low-calorie alternative!  This winter squash stands at about 45 calories per cup, whereas 1 cup of pasta yields about 200 calories.  Look how much you are saving!!  And besides saving calories you are getting an abundance of nutrients:

Fiber: Spaghetti squash is rich in fiber, which aids in making you feel full for longer, which aids in weight loss.  Fiber also has impact on heart health by aiding in the  lowering of your cholesterol.

Beta Carotene:  This nutrient is indicated by the yellow color of the squash!  The body converts beta carotene to Vitamin A which aids in boosting the immune system and healthy eyes.

Vitamin C: A strong antioxidant, decreasing the formation of cancer causing agents within the body.

B Vitamins: These vitamins (B1, B3, B5, B6) are important for proper cellular function.

Folate: Also know as Vitamin B9, is very important for women who are pregnant, or are planning on becoming pregnant.  Folic Acid aids in decreasing the risk of neural tube defects in infants, such as spina bifida.  Folate is also great for anyone in decreasing the risk of damage to blood vessel walls.

Potassium: This mineral aids in controlling blood pressure.

Antioxidant: Beta Carotene and Vitamin C are two major antioxidants in spaghetti squash and prevent cell damage.

Hopefully you will not wait as a long as I have to make this wonderful squash! Enjoy!

Molly Jean
Crock Pot French Dip

Standard

Yesterday I made a delicious meal- Crock Pot French Dip.  I found the recipe on Pinterest, courtesy of allrecipes.com.  The recipe is so simple, and there is barely any prep work!  Plus it makes the house smell amazing all day long!

Ingredients

  • 4 pound rump roast
  • 10.5 oz beef broth
  • 10.5 oz can of condensed French onion soup
  • 12 fluid oz of beer (I used Great Lakes Elliot Ness!)
  • 4-6 French Rolls or Hoagie rolls (depending how many people you are serving, or how big of a sandwich you want!)
  • 8-12 slices of Provolone cheese (or whichever you prefer)
  • butter

Directions:

Trim excess fat, if any, off of rump roast and then place in crock pot.  Add the beef broth, soup, and beer and cook over low heat.  (The original recipe says for 7 hours.  I cooked mine for 9!!).

When close to serving time, Preheat oven to 350 degrees F.  Split rolls, but not all the way- (I used hoagie) and spread each side with butter.  Put in oven for 10 minutes.  When there is 5 minute left place 2 sliced into each roll and let cheese melt.  (The original recipe didn’t use cheese, but I thought it added a nice touch)

While rolls are in the oven slice rump roast into thin slices (I think mines were a little thick, but still tasted wonderful!). Place slices into prepared rolls. Close roll and slice.  Use juice/liquid mixture in crock pot and place into small bowls to dip in.  Serve with a nice cold beverage and enjoy!

click here for the original recipe

Molly Jean

Homemade Pasta!

Standard

Yikes!! I need to keep up with this blogging thing! I apologize for the week break!

—–

For Christmas my boyfriend’s parent’s gave me an Imperia pasta machine!  After going to Italy, as well as trying some Ohio City Pasta that I have bought from Cleveland’s West Side Market in the past, fresh pasta is the way to go!  I’ll admit, I usually grab a box of Barilla when making pasta for dinner, but if you have the time and have a pasta machine, you should definitely try making some homemade pasta!  You can always make it in bulk, too, and freeze pasta for another days use!

For the pasta I used the recipe on the back of a Semolina Flour bag:

Ingredients:

  • 2 1/3 cups of semolina flour
  • 2 fresh eggs, lightly beaten
  • 1/2 tsp salt
  • 1 tsp olive oil
  • 2/3 cup warm water (plus more if needed)

Directions:

Sift flour onto clean surface and make a well in the center. Pour in eggs, oil and salt. Mix the ingredients with a fork, slowly and gradually incorporating the flour with the wet mixture.  Add warm water until dough is soft enough to handle.  Knead dough into a soft, workable ball.  Cover needed dough with plastic wrap and place in the refrigerator for an hour.

Dough after it has been in the refrigerator for an hour

Next you are going to separate the dough into 3 sections. Start with one and roll out with a rolling pin.  You may need some flour so that the dough won’t stick to the surface and rolling pin.  Next follow the directions to your pasta maker!!

Roll with Rolling Pin

Roll in Pasta maker to thin out pasta

cut pasta!

Hang (if you have a pasta rack)

With the pasta maker I was also give the lovely rack (above).  If you are not cooking the pasta right away you can either place it in bundles to be place in the freezer, or, I put a damp kitchen towel over the pasta on the rack to keep from drying out!

I decided to make a roasted pepper and shrimp pasta with a lemon and garlic sauce!

  • First I roasted a green, red, and yellow pepper in the oven on broil until the peppers became blistery.
  • Next I placed in a bowl and covered with suran wrap until the peppers were cooled (about 30 minutes).
  • Next I peeled the skin and sliced!

Roasted Peppers

Here are all of my ingredients I used for the pasta:

  • Homemade pasta from above!
  • 3 TBSP Olive oil plus 1 TBSP lemon olive oil (if you have it)
  • small onion/leek/or scallions- finely chopped or thinly sliced
  • 3-4 cloves of garlic (minced)
  • 1 lemon Lemon, zested and juiced
  • Roasted Peppers from above
  • About 20-25 raw large Shrimp
  • 1/4 cup Grated Parmesan cheese (or more to your liking!)

Ingredients

Directions: 

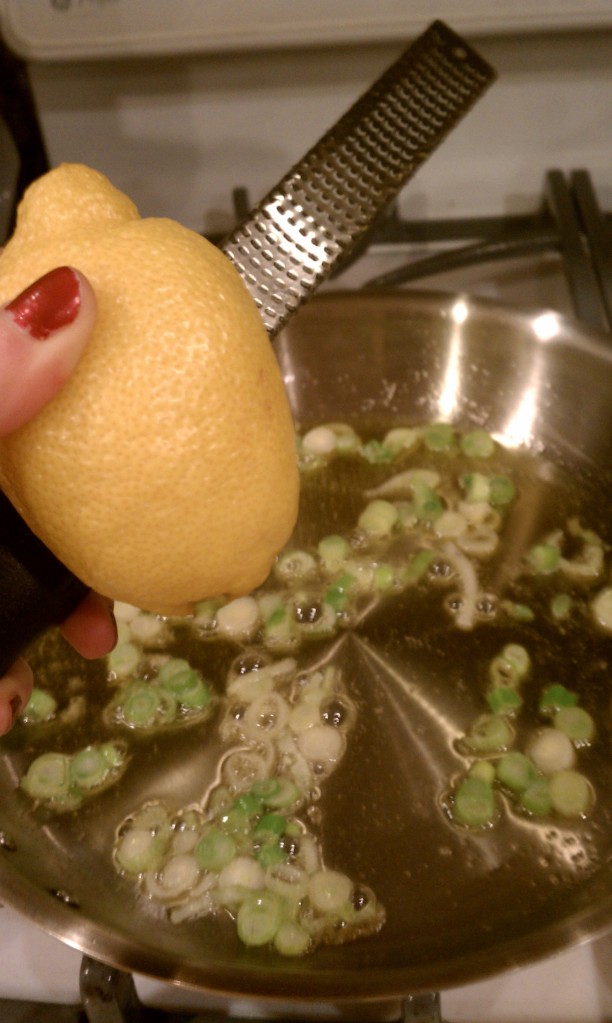
Fill a large pot with water and allow water to come to a boil (for pasta).  Put olive oil in large pan and heat over medium high heat.  Add onions and cook until softened.  Next add minced garlic and lemon zest and juice.

Lemon zest

Cook for about 5 minutes over medium heat. Be sure to not let the garlic burn!  Next add the sliced roasted peppers.

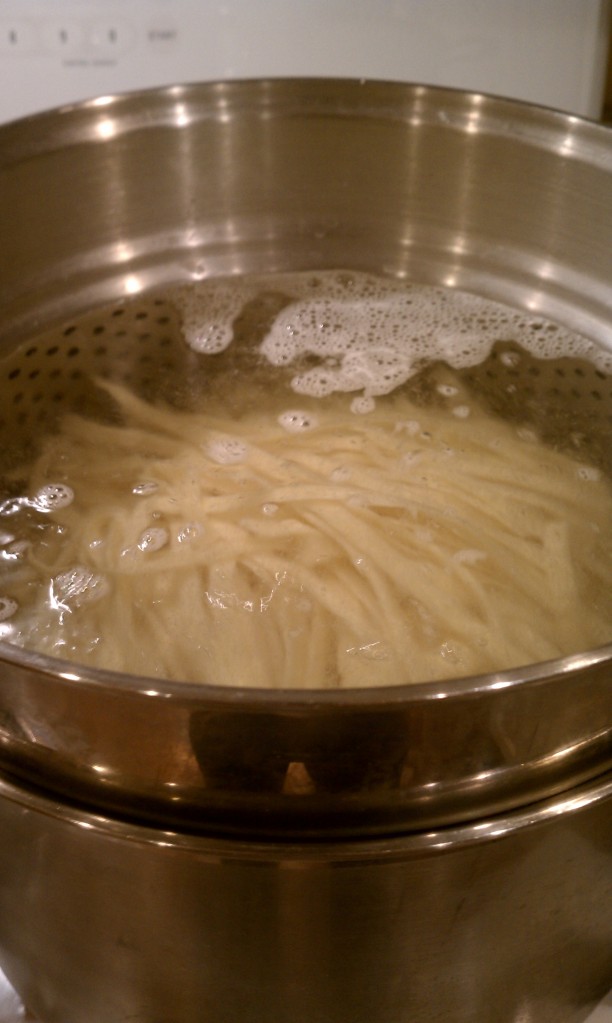
Next put the pasta in the boiling water.  Boiling will stop. Once the water comes back to a boil, cook the pasta 4-5 minutes until al dente!  While Pasta is cooking put raw shrimp into the pan with peppers and garlic/lemon sauce.  Cook shrimp until pink, about 5 minutes.

Add cooked pasta to pepper and shrimp mixture.  Add Parm Cheese.  Using tongs, mix together.

Last step – Enjoy 🙂

Yum!

Molly Jean

Jon and Erin’s Wedding and Deagan’s Brunch!

Standard

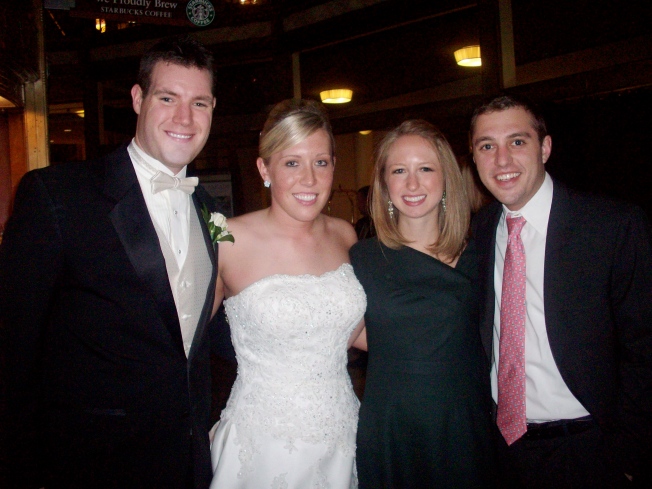
Two very good friends of mine got married on Saturday!! The ceremony was in Rocky River at St. Christopher’s and the reception was at The Arcade in downtown Cleveland.  It was a great day for such a great couple! Here are some pictures!

Jordan and I with the newly weds!

Jordan and I in The Arcade before the reception

Photo by Jenny Rogers- OU swim team pic!

So after a long night of celebrating and catching up with friends a good brunch was needed on Sunday.  Jordan and I love Sunday brunch and hope to start a blog soon.  There are a number of places to grab brunch in Cleveland and we want to try them all and tell the world about them! But things are a bit hectic right now, so hopefully we will get to try all of them soon 🙂

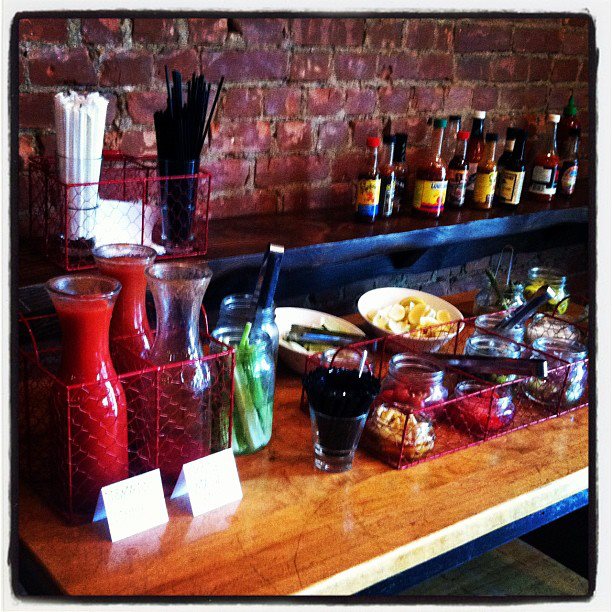
Sunday we went to our go to spot for Brunch, Deagan’s Kitchen and Bar in Lakewood, Ohio.  We first heard about the gastropub from my mother, who knew the owner’s wife from work.  We only knew of it as just a bar to grab lunch and dinner at first.  And quite frankly, I really don’t remember how we discovered brunch! Maybe we were going to try for lunch one Sunday and found out when the “Brunch” menu was placed down in front of us.  But, we fell in love day one.  They have an array of mimosa flavors and a bloody mary bar!

Mango Mimosa


Bloody Mary Bar (Photo By: Kyle Melling)

I usually get the Egg’s Benedict and Jordan gets the DKB Steak and Eggs.  I do not have pictures of those food items, but those are pretty self explanatory.  I do have pictures of a couple other items we have tried!

Mimosas

Lobster Mac n Cheese w/ Petit Salad

f

Chorizo Breakfast Taco's

Everything I have tried has been delish! Check it out!

Once again, congrats to Erin and Jon!!

Molly Jean
Shredded Chicken Crock-pot Taco’s

Standard

For the past few weeks I have been taking part in the “Taco Tuesday” trend and I am obsessed! There are so many different ways to make taco’s!  And with all the recipes I have found on Pinterest there are many more Taco Tuesdays to go!

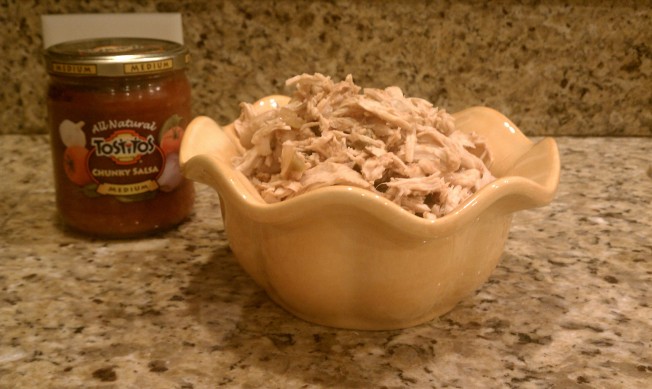
This week I moved Taco Tuesday to Thursday because my brother is coming home for the weekend.  I made Shredded Chicken Crockpot Taco’s from a recipe I found on Pinterest.  The recipe is courtesy of Paleo Perfectly.  You can click here to get the recipe or follow it below!

Ingredients:

1.5-2 Pounds skinless chicken breast

1 cup chicken broth

1/3 cup salsa (your choice!)

1/2 tsp onion powder

1/2 tsp garlic powder

1/8 tsp chile powder (or more if you like a little more heat)

1/4 tsp paprika

1.5 tsp cumin

pinch of salt and pepper to taste

Directions:

Place all ingredients in a crockpot and cook on low heat for 6-8 hours.  Shred the chicken 1/2 hour before serving.  Place back in the crockpot with all of the juices to allow chicken to absorb more flavor!  Serve chicken with your favorite tortillas, taco shells, and toppings and enjoy!

It’s as simple as that!! This is a great recipe to put in the crockpot before leaving for work in the morning.  It is cheap, easy, and fun to eat! Also, if you have kids, it’s a great way to get kids involved in the kitchen, whether that be shredding the chicken, cutting up colorful veggies, and they are able to make their own taco’s!

Tonight I am going to the Cleveland Cavs vs Miami Heat game… aka the “We hate Lebron” game.  Can’t wait!! Have a great weekend all!

Molly Jean

Week Day Date Night

Standard

I usually only see my boyfriend on the weekends due to his busy schedule and mine- well at least mine used to be busy between studying, my internship, and working on my Master’s Project.  I never thought I would say this, but life is a little boring without school.  I’ve never had nothing to do- and I do NOT like it one bit.  Applying for jobs only takes up so much of my day.  The rest of the day is devoted to working out and finding things to do to fill my time, whether that is cleaning some room in the house, organizing and reorganizing my room or the kitchen, looking up recipes, pinning on Pinterest, and thinking about the weekend when I get to see my boyfriend!  Hopefully I will begin to work soon!

Last night I brought my boyfriend some leftovers from dinner the previous night.  My mom had made stuffed peppers and there were 2 large portions leftover.  We are not big on eating our leftovers in my family, and I did not want anymore food to go to waste, especially since stuffed peppers are one of my boyfriend’s favorite foods!  He was thrilled to know a home cooked meal would be coming to him!

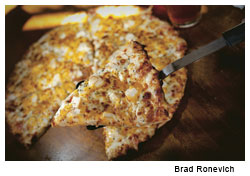
I have been craving pepperoni pizza for the past month.  My all time favorite pizza place is Courtside Pizza in Athens, Ohio- where Ohio University is (where I went for undergrad)- preferably their BBQ Chicken Pizza!  It is very difficult to find any place that compares to Courtside’s pizza here in Cleveland, Ohio.  But last night, I, along with my taste buds, were impressed!!  We went to The Map Room, located on West 9th in downtown cleveland.  I have only ever grabbed a few drinks there before, but I have heard they are known for their pizza, so I thought I should finally give it a try!  It met my expectations, and beyond!

The picture above is not the pepperoni pizza that I ate (I need to start remembering to take pictures of my food- I was a pro in Italy!).  The picture is from an article from Cleveland Magazine titled “20 Great Bar Eats.”  The article featured The Map Rooms Fiesta Chicken pizza… looks like I will have to try that next!  Click the picture to read about it!

Other great pizza places I have been to in the Cleveland Area are Geraci’s, located in University Heights, Vinny’s Pizza in Aurora, Pizza by Robert in Westlake, Angelo’s in Lakewood, Dewey’s Pizza in Lakewood.  There are probably more I have tried, but those are the one’s that stick out in my mind.  If anyone has any suggestions, please feel free to share!

Molly Jean

Valentine’s Day- Chocolate Covered Strawberries!

Standard

Oh Valentine’s Day… Although I believe it is a Hallmark gimmick, It is nice to be treated “extra” special.  My boyfriend has a pretty hectic work schedule, so we were able to celebrate over the weekend.  He took me a Blue Point Grill, located downtown Cleveland.  Probably the best seafood restaurant in the city!  It was a splurge, but definitely worth it!

Although I did not get to spend Valentine’s Day with my guy, I was still surrounded by people I love and who love me, my parent’s.  I don’t have much money to buy flowers or expensive chocolates, but there were a pint of strawberries and a bag of semi-sweet chocolate chips in the house!  I knew it was something my parent’s would enjoy (and me!)!  Chocolate Covered strawberries are a perfect Valentine’s Day treat- chocolaty, sweet, and healthy!  And super easy to make

What you’ll need:

1 pint of strawberries, cleaned

1  12 ounce bag semi-sweet chocolate chips (or any type of chocolate chip your heart desires!)

Directions:

1. Using a medium size sauce pan, fill with about 1-2 inches of water.

2. On the stove, heat water until it begins to boil and then turn on the lowest setting, or shut heat off completely.

3. Pour chocolate chips into a heat safe bowl and place on sauce pan.  Be sure the water is not touching the bowl.

4.  Let the chocolate chips sit for about a minute and then mix with a fork or whisk. The chocolate will slowly melt.

5.  When the chocolate is ALMOST melted, remove the bowl (and turn the stove off if still on). Continue to mix chocolate until completely melted.

6. Set up a tray with parchment paper.  This is where you will place the strawberries to dry!

7. Dip each strawberry into the chocolate while holding the stem and then place on the parchment paper.

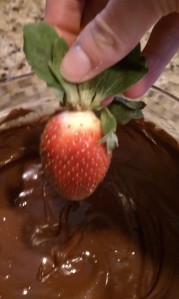
hold by stem

Dip into chocolate

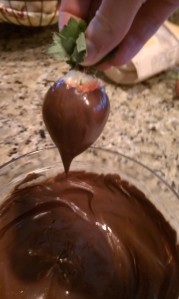
Pull out from chocolate

Place on tray covered in parchment paper

8. Once all strawberries have been covered let strawberries out room temp to dry, or place them in the fridge if you like them cold!

9. Enjoy with people you love!

I hope everyone had a wonderful Valentine’s Day!

Molly Jean